The quest for luscious, flowing locks leads many to explore hair extensions, yet the choice between I-Tip and U-Tip methods often leaves beauty enthusiasts at a crossroads. Picture this: you're standing in a salon, surrounded by glossy hair samples, while your stylist mentions "microbeads" and "keratin bonds" - terms that sound more like science experiments than beauty solutions. This is where understanding these two revolutionary techniques becomes crucial for achieving that coveted, natural-looking mane.
What makes the difference between hair that looks effortlessly gorgeous and extensions that scream "fake"? The secret lies in selecting the right method for your unique hair characteristics. While I-Tip extensions gently clasp individual strands with tiny aluminum beads, their U-Tip counterparts create a permanent-looking bond using heat-activated keratin - each approach offering distinct advantages depending on your hair type and lifestyle.
The modern approach to extensions has evolved far beyond simple length addition. Today's savvy clients demand solutions that respect their natural hair's integrity while providing undetectable volume and movement. This paradigm shift has made considerations like strand thickness, daily activities, desired longevity, and upkeep commitment the cornerstone of successful extension choices. Whether you're a busy professional needing low-maintenance options or a fine-haired individual seeking non-damaging alternatives, this guide will illuminate the path to your perfect match.
Understanding I-Tip Extensions: The Gentle Art of Hair Enhancement
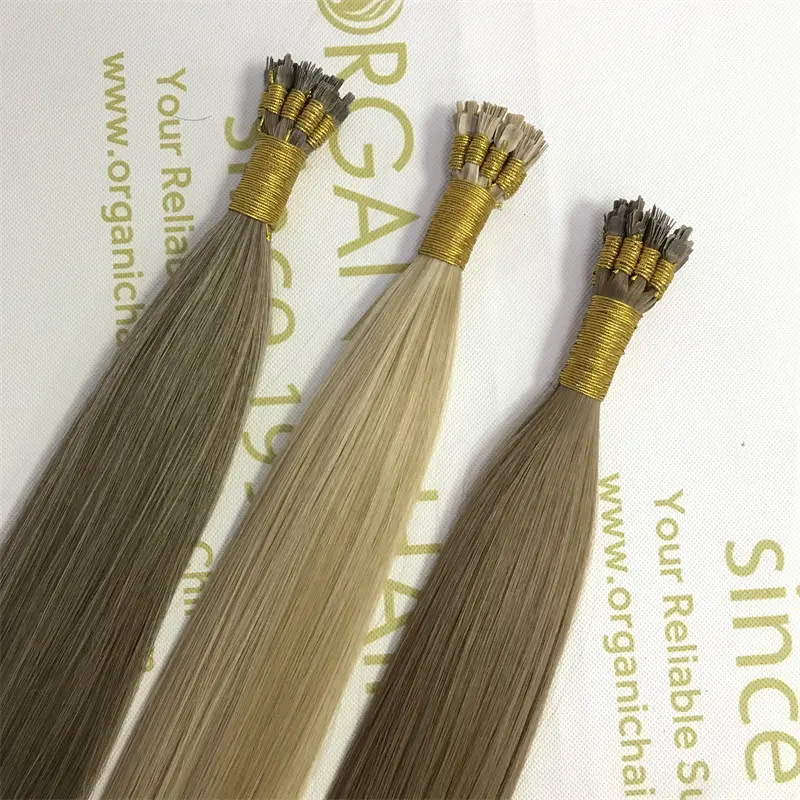
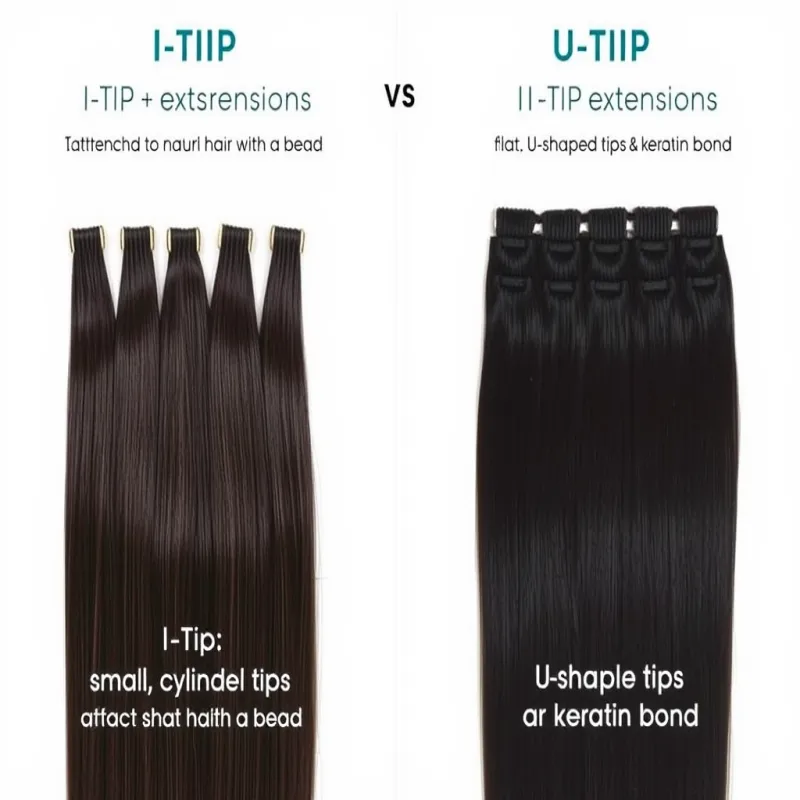
For those seeking a damage-free path to longer, fuller hair, I-Tip extensions (also called micro bead or micro loop extensions) have emerged as a revolutionary solution. Unlike traditional methods that rely on harsh adhesives or heat application, this innovative technique uses tiny, cylindrical aluminum beads to create a secure yet gentle attachment. Here's how it transforms your hair: a small section of natural hair is threaded through a micro bead, then the extension strand is looped through and clamped shut with specialized pliers. This mechanical attachment requires no glue, no heat, and no chemicals - just pure physics creating an undetectable bond that moves naturally with your hair.
The magic of I-Tips lies in their universal adaptability with fine or thin hair types. Traditional extension methods often prove too heavy or damaging for delicate strands, but the precision placement of micro beads distributes weight evenly across multiple anchor points. This means even clients with baby-fine hair can enjoy 20 inches of luxurious length without fear of breakage or stress on their follicles. The beads themselves are color-matched to your roots, becoming virtually invisible when properly installed by a skilled technician. What's more, the installation process takes advantage of your hair's natural growth patterns - extensions are strategically placed where they'll blend seamlessly while providing optimal support.
Beyond hair type considerations, I-Tips shine for those wanting temporary or removable extensions with maximum flexibility. The system allows for easy adjustments as your hair grows - typically every 6-8 weeks - and extensions can be reused multiple times with proper care. This makes them ideal for special occasions, seasonal style changes, or anyone testing the extension waters for the first time. Unlike permanent methods that commit you to months of wear, I-Tips offer the freedom to remove them whenever desired without damaging your natural hair underneath.
When it comes to achieving a natural look, I-Tip extensions consistently score high marks across several key metrics:
Seamless blending: The individual bead placement allows for customized distribution that mimics natural hair growth patterns
Weight distribution: At just 0.5-0.8 grams per strand, they add volume without bulk
Movement: Unrestricted by large bonds or adhesive, hair flows and sways naturally
Scalp visibility: Tiny beads disappear against the scalp, even with updos or ponytails
Professional stylists particularly recommend I-Tips for clients prioritizing hair health alongside aesthetic results. The non-invasive nature of the application means no exposure to harsh adhesives or high heat that can degrade hair quality over time. Maintenance is surprisingly simple - just use sulfate-free products, avoid tugging at the beads, and schedule regular salon checkups. With proper care, I-Tip extensions can deliver 3-4 months of beautiful, natural-looking hair that grows with you and protects your natural strands every step of the way.
Understanding U-Tip (Fusion) Extensions: The Long-Lasting Volume Solution
When durability meets hair transformation, U-Tip extensions (commonly called fusion extensions) deliver remarkable results through their innovative adhesive technology. Unlike temporary attachment methods, these extensions use heat-activated keratin bonds that create a semi-permanent fusion with your natural hair. Here's the science behind it: each extension strand features a small, U-shaped tip containing medical-grade keratin adhesive. When heated to precise temperatures (typically 180-200°F) with a special fusion iron, the bond melts and wraps around your natural hair, creating a secure connection that lasts for months. This process, while more involved than clip-ins or microbead methods, offers unparalleled staying power for those seeking a long-term solution.
U-Tip extensions excel for clients with thick or coarse hair textures that demand stronger hold. The keratin bonds provide substantial anchoring power that can support the weight of heavier extension strands without slippage - a common challenge with other methods. The bonds are strategically placed about 1-2 inches from the scalp, allowing for natural movement while maintaining security. For those with voluminous natural hair, U-Tips blend exceptionally well, as the slightly larger bond size (about the size of a sesame seed) disappears easily within thicker sections. Stylists often recommend placing them in deeper layers where they're completely concealed while providing maximum lift and body.
The long-term wear advantage (typically 2-3 months per installation) makes U-Tips a favorite among busy professionals and those who prefer low-maintenance routines. Unlike temporary extensions requiring weekly adjustments, properly installed fusion extensions maintain their position as your hair grows, needing only occasional professional touch-ups. This longevity comes with important care requirements: sulfate-free shampoos to preserve bond integrity, careful brushing from tips to roots, and avoiding excessive heat near the bonds. When maintained properly, the same set of U-Tip extensions can often be reused for multiple installations, making them a cost-effective choice over time.
In the natural look scoring system, U-Tip extensions earn a moderate rating that improves dramatically with proper installation techniques:
Bond visibility: Slightly more noticeable than microbeads in fine hair, but easily concealed in layered styles
Blendability: Excellent for medium to thick hair when color-matched precisely
Styling versatility: Withstands heat tools and updos better than many temporary methods
Growth adaptation: Bonds move naturally with hair growth when properly spaced
While the bonds are slightly more substantial than I-Tip beads, skilled stylists overcome this through strategic placement - typically positioning them under top layers or where natural hair parts occur. The key to maximizing U-Tips' natural appearance lies in three factors: precise color matching, graduated length placement, and professional installation that follows your hair's natural growth patterns. For clients wanting transformative length and volume that lasts through showers, workouts, and styling sessions, U-Tip extensions offer that perfect balance of durability and beauty - proving that sometimes, the strongest bonds create the most natural-looking results.
Key Comparison: Which Hair Extension Looks More Natural?
When choosing between I-Tip and U-tip extensions, achieving a natural look depends on three crucial factors: blendability, scalp visibility, and styling flexibility. Here’s a detailed breakdown to help you decide which method best suits your hair type and lifestyle.
1. Blendability: Which Extensions Disappear Seamlessly?
I-Tip Extensions
Best for fine or thin hair – The tiny microbeads attach discreetly without adding bulk.
Layered blending – Since each strand is individually placed, they mimic natural hair growth patterns.
No adhesive residue – Unlike U-tips, there’s no risk of visible glue clumps.
U-Tip Extensions
Ideal for thick or coarse hair – The keratin bonds blend well in dense hair, where they’re easily hidden.
Slightly bulkier bonds – While noticeable in fine hair, strategic placement (underneath layers) keeps them concealed.
Better for high-volume styles – The firm hold prevents slippage, making them great for curly or wavy textures.
2. Scalp Visibility: Which Extensions Stay Undetectable?
I-Tip Wins for Minimal Visibility
The microbeads are as small as a grain of rice, disappearing against the scalp.
Even in updos or high ponytails, the beads remain nearly invisible.
U-Tip’s Moderate Scalp Visibility
The bonds are slightly larger (sesame seed-sized), which can be noticeable if placed too close to the scalp.
Proper installation (1-2 inches from roots) ensures they stay hidden under natural hair layers.
3. Styling Flexibility: Heat vs. Damage-Free Options
U-Tip Extensions Allow Heat Styling
Since the bonds are heat-activated, they can handle curling irons, straighteners, and blowouts without loosening.
Best for those who frequently restyle their hair.
I-Tip Extensions Avoid Heat Damage
No glue or heat means safer for fragile hair.
However, excessive heat near the beads can weaken them, so low-heat styling is recommended.
Final Verdict: Which Looks More Natural?
| Factor | I-Tip Extensions | U-Tip Extensions |
|---|---|---|
| Blendability | ★★★★★ (Fine hair) | ★★★★☆ (Thick hair) |
| Scalp Visibility | ★★★★★ (Undetectable) | ★★★☆☆ (Hidden with layers) |
| Styling Freedom | ★★★☆☆ (Heat-sensitive) | ★★★★★ (Heat-friendly) |
Choose I-Tip if: You have fine hair and want the most natural, lightweight look.
Choose U-Tip if: You need long-lasting hold and have thick hair that can conceal bonds.
Both methods can look incredibly natural—the key is proper installation and hair type compatibility.
Choosing the Right Hair Extensions Based on Your Hair Type
Selecting between I-Tip and U-Tip extensions largely depends on your natural hair texture, thickness, and color treatment. Here’s a detailed guide to help you make the best choice for flawless, natural-looking results.
1. Fine or Thin Hair: I-Tip Extensions Are Ideal
Why I-Tip Works Best:
Gentle on Fragile Strands
The microbead attachment doesn’t require glue or heat, minimizing stress on delicate hair.
Distributes weight evenly, preventing tension-related breakage.
Undetectable Blending
Tiny beads disappear against fine hair, making extensions virtually invisible.
No bulky bonds that could show through sparse areas.
Flexible for Low-Density Hair
Since I-Tips are applied strand-by-strand, they add volume without overwhelming thin hair.
Avoid U-Tip If:
The keratin bonds may be too heavy, causing strain on fine roots.
Thicker bonds can appear noticeable if hair is too sheer.
2. Thick or Curly Hair: U-Tip Extensions for Superior Hold
Why U-Tip Excels:
Stronger, Longer-Lasting Bond
Keratin fusion withstands the weight of dense hair better than microbeads.
Ideal for curly or coily textures that need extra security.
Handles Volume Naturally
Bonds blend seamlessly within thick layers, avoiding a "flat" look.
Works well with voluminous styles (e.g., big curls, braids).
Heat-Friendly for Styling
Unlike I-Tips, U-Tips won’t loosen with hot tools—perfect for frequent straightening or curling.
Avoid I-Tip If:
Your hair is too heavy, causing microbeads to slip.
You need extensions to last 2+ months without adjustments.
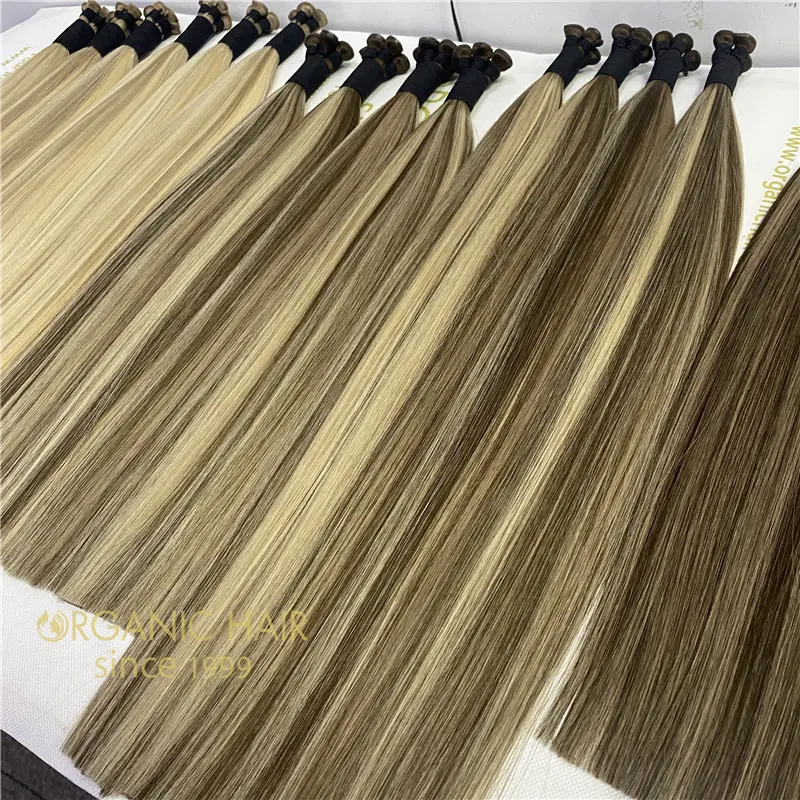
3. Balayage or Highlighted Hair: I-Tip for Seamless Color Matching
Why I-Tip Wins for Color-Treated Hair:
Easier to Match Multi-Toned Hair
Individual strands can be mixed for perfect balayage blending.
No risk of adhesive discoloration (unlike U-Tip bonds exposed to dyes).
Adjustable for Root Growth
Beads can be moved as highlights grow out, maintaining a natural grow-out effect.
U-Tip Challenges with Highlights:
Bonds may require color-matching to avoid visible patches.
Less flexible if you frequently change your hair color.
Quick Decision Guide
| Hair Type | Best Extension | Key Benefit |
|---|---|---|
| Fine/Thin Hair | I-Tip | Lightweight, undetectable |
| Thick/Curly Hair | U-Tip | Strong hold, blends with volume |
| Balayage/Highlights | I-Tip | Effortless color matching |
Pro Tip: Consult a stylist who specializes in both methods to assess your hair’s density, elasticity, and color before committing.
Lifestyle & Maintenance: Choosing Between I-Tip and U-Tip Extensions
Your daily routine and commitment to upkeep play a huge role in determining whether I-Tip or U-Tip extensions are right for you. Here’s how each method fits different lifestyles:
1. Low-Maintenance Wear: I-Tip Extensions
Best For:
Busy schedules – No need for frequent salon visits (adjustments every 6-8 weeks).
Reusable & adjustable – Beads can be moved as hair grows, extending their lifespan.
Easy removal – Can be taken out anytime without professional help.
Maintenance Tips:
✔ Use a loop brush to prevent tugging on beads.
✔ Sleep with hair in a loose braid to minimize friction.
✔ Avoid heavy oils near the roots to prevent slippage.
2. Active Lifestyles: I-Tip for Secure Wear
Why They Win for Fitness Enthusiasts:
No adhesive melt risk (unlike U-Tips exposed to sweat/heat).
Lightweight beads stay put during runs, yoga, or gym sessions.
Quick-drying – No sticky bonds to trap moisture.
Care for Active Wearers:
✔ Rinse hair after intense workouts to remove sweat buildup.
✔ Opt for non-slip hair ties for secure ponytails.
3. Long-Term Wear: U-Tip Extensions
Best For:
2-3 months of continuous wear – Fewer salon visits needed.
Set-and-forget styling – Bonds stay secure without daily adjustments.
Heat styling freedom – Bonds won’t loosen with blowouts or curling irons.
Maintenance Musts:
✔ Sulfate-free shampoo to preserve bond integrity.
✔ Brush gently from ends to roots to avoid bond stress.
✔ Schedule professional removal to prevent damage.
Quick Comparison
| Lifestyle Factor | I-Tip | U-Tip |
|---|---|---|
| Maintenance Level | Low (DIY adjustments) | Medium (Pro removal) |
| Activity-Friendly | ★★★★★ | ★★☆☆☆ (Sweat weakens bonds) |
| Longevity | 6-8 weeks per install | 2-3 months |
Final Tip: If you’re always on the go, I-Tips offer flexibility. If you prefer long-term glam with minimal touch-ups, U-Tips are ideal.
Pro Tips for a Natural Hair Extension Finish
Achieving undetectable, salon-perfect extensions requires more than just proper installation—styling and customization make all the difference. Whether you choose I-Tip or U-Tip extensions, these professional secrets will ensure your hair looks effortlessly natural.
1. Cutting & Blending: The Art of Custom Trimming
For I-Tip Extensions:
Point-cutting – A razor or shears are used to soften ends, preventing a blunt "extensions look."
Face-framing layers – Blends extensions with natural hair around the perimeter.
Dusting – Light trimming removes any unevenness while preserving length.
For U-Tip Extensions:
Blunt cuts work best – Helps disguise bonds in thicker hair.
Avoid over-thinning – Can make bonds more visible in fine hair.
Pro Stylist Tip:
➔ "Always cut extensions after installation—never before. This ensures perfect integration with your natural hair."
2. Layering: Strategic Placement for Hidden Bonds (U-Tip)
Place bonds under top layers – Ensures they’re concealed when hair moves.
Stagger bond placement – Avoids a "row" effect that looks unnatural.
Match bond size to hair density – Smaller bonds for fine hair, standard for thick hair.
For Curly Hair:
Bonds should be placed deeper in the curl pattern to camouflage them.
3. Color Matching: The Key to Seamless Extensions
For I-Tip & U-Tip:
Root-to-tip swatch testing – Compare extensions to your hair in natural light.
Balayage-friendly tips:
Mix multiple extension shades for dimension.
Use temporary root sprays for perfect grow-out blending.
Avoid These Mistakes:
✖ Ignoring undertones (e.g., cool vs. warm blonde).
✖ Over-lightening bonds (can make U-Tips look artificial).
Bonus: Styling Hacks for the Most Natural Look
✔ Texture spray – Helps blend extensions with natural hair.
✔ Root shadowing – Softens harsh lines for grow-out phases.
✔ Dry shampoo – Adds grip to I-Tip beads, reducing slippage.
Final Pro Advice:
➔ "The best extensions are the ones nobody can tell you're wearing. Invest in a stylist who specializes in custom cutting and color-matching for flawless results."
Common Hair Extension Mistakes to Avoid
Even the best extensions can look unnatural—or worse, damage your hair—if these critical mistakes are made. Whether you're a first-time wearer or a seasoned pro, steer clear of these pitfalls for flawless, healthy results.
1. Choosing U-Tip for Fine or Thin Hair
Why it’s bad: The keratin bonds are too heavy for delicate strands, causing breakage or visible clumps.
Fix: Opt for I-Tip extensions (microbeads) instead—they’re lightweight and gentle.
2. Skipping Professional Installation
Why it’s bad: DIY or inexperienced stylists may place bonds too close to the scalp or unevenly, creating obvious "bumps."
Fix: Always visit a certified extension specialist for seamless blending.
3. Overloading with Too Many Extensions
Why it’s bad: Excess weight strains roots, leading to traction alopecia or unnatural density.
Fix: Follow the "30% rule"—extensions should never exceed 30% of your natural hair’s volume.
Bonus Mistakes:
Washing hair too soon after installation (wait 48 hours for U-Tip bonds to fully cure).
Using sulfate shampoos (breaks down adhesive over time).
Tugging at beads/bonds (causes premature shedding).
Pro Tip: When in doubt, consult your stylist—better safe than sorry!
Final Verdict: I-Tip vs. U-Tip Extensions – Which Is Right For You?
Choose I-Tip Extensions If You...
✔ Prioritize a natural, undetectable look (best for fine/thin hair)
✔ Want minimal damage (no glue or heat required)
✔ Need temporary or flexible wear (easy to remove/reuse)
✔ Lead an active lifestyle (sweat-proof and lightweight)
Choose U-Tip Extensions If You...
✔ Have thick or coarse hair that can support bonds
✔ Want long-term wear (2-3 months without adjustments)
✔ Frequently use heat tools (bonds withstand styling)
✔ Prefer low-maintenance glam (fewer salon visits)
Still unsure? Book a consultation with an extension specialist to analyze your hair type and lifestyle needs!
Hair Extensions FAQ: I-Tip vs. U-Tip
1. Can I Swim with I-Tip or U-Tip Extensions?
I-Tip: Yes, but:
Rinse hair immediately after swimming (chlorine/saltwater weakens beads).
Wear a swim cap or braid hair to minimize tangling.
U-Tip: Caution required:
Chlorine can degrade keratin bonds over time.
Avoid submerging hair for long periods; apply leave-in conditioner beforehand.
2. Which Lasts Longer?
I-Tip: 6–8 weeks (requires monthly adjustments as hair grows).
U-Tip: 2–3 months (bonds stay secure longer but need professional removal).
3. Can I Reuse Them?
I-Tip: Yes! Microbeads can be reopened and reinstalled 2–3 times with proper care.
U-Tip: Sometimes – Bonds must be professionally removed and cleaned; reuse depends on hair condition.
4. Do Extensions Damage Natural Hair?
I-Tip: Minimal risk if installed correctly (no heat/glue).
U-Tip: Potential for breakage if removed improperly or left in too long.
5. Which Is More Affordable?
I-Tip: Lower initial cost but more frequent maintenance.
U-Tip: Higher upfront price but lasts longer between touch-ups.
Pro Tip: Always consult your stylist for personalized advice based on your hair health!